
(Part 1/3) In this post, I shall manually setup from scratch a Wireguard VPN on an AWS EC2 instance and make it available for secure browsing from my mobile devices.
This setup process will be full manual for our first post, to understand all the principles and terminology before Post 2 where we will use the AWS CLI and Ansible to provision the EC2 instance; and later Post 3 where we will use Terraform and Infrastructure-as-Code principles to create the whole setup automatically.
Domain Name
First things first, although not strictly necessary, we should acquire a short random domain name, something we can point to on our mobile devices, it is easier to remember than an IP address, and we won’t need to change the configuration if we need to restart the infra in the cloud and lose the temporary IP address. So head over to somewhere like domainnamesoup.com

And now pop open the AWS Route53 Domain Name Registration Page to check for yourself and see if your chosen domain is available
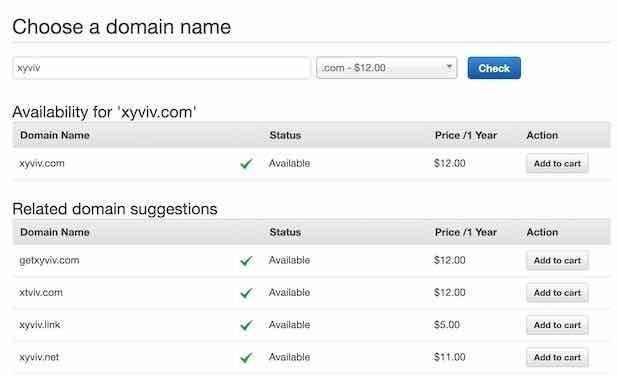
And we can see that xyviv.com is available and I can have it for $12.00 per year. Better is that xyviv.link is available for $5.00/year. Wooo!
Make your purchase and let’s set up a server.
Debian Server on AWS EC2
In the AWS console, head over to the EC2 page and choose Launch Instance. The Debian Wiki has the AMI numbers for Debian 11 per region here. Cut and paste the AMI number for your region into the box, then choose instance type. For my server I have chosen a t3.micro server, and I made sure there was a security rule to open port 22 on 0.0.0.0/0.
If you don’t have a key-pair already set up, allow AWS to create on for you and download the key. Remember to set permissions and use the key when ssh to the host. Get the host IP from the AWS control panel, check your running instances and you will see the IPv4 address.
$ ls -la ./Downloads/aws-ec2-key.pem
-rwxr-xr-x  1 jas  staff  1704 Feb  7 19:44 ./Downloads/aws-ec2-key.pem

$ chmod 400 ./Downloads/aws-ec2-key.pem

$ ls -la ./Downloads/aws-ec2-key.pem
-r--------  1 jas  staff  1704 Feb  7 19:44 ./Downloads/aws-ec2-key.pem

$ ssh -i ./Downloads/aws-ec2-key.pem admin@18.195.111.144
Update on First Run
As soon as you log into the Debian host, run this to get your packages up to date
$ sudo apt update && sudo apt -qy upgrade
Setup ufw firewall
Install ufw and set it up to allow incoming ssh traffic on port 22:
$ sudo apt install ufw
$ sudo ufw status verbose
$ sudo ufw allow 22/tcp
$ sudo ufw enable
$ sudo ufw status verbose
Status: active
Logging: on (low)
Default: deny (incoming), allow (outgoing), disabled (routed)
New profiles: skip

To                         Action      From
--                         ------      ----
22/tcp                     ALLOW IN    Anywhere
22/tcp (v6)                ALLOW IN    Anywhere (v6)
Add fail2ban to stop ssh login hammering
Add the fail2ban package to protect your server against ssh login hammering
$ sudo apt -qy install fail2ban
$ sudo systemctl status fail2ban
● fail2ban.service - Fail2Ban Service
     Loaded: loaded (/lib/systemd/system/fail2ban.service; enabled; vendor preset: enabled)
     Active: active (running) since Mon 2022-02-07 16:14:56 UTC; 1h 34min ago
       Docs: man:fail2ban(1)
    Process: 2015 ExecStartPre=/bin/mkdir -p /run/fail2ban (code=exited, status=0/SUCCESS)
   Main PID: 2016 (fail2ban-server)
      Tasks: 5 (limit: 1118)
     Memory: 13.9M
        CPU: 1.913s
     CGroup: /system.slice/fail2ban.service
             └─2016 /usr/bin/python3 /usr/bin/fail2ban-server -xf start

Feb 07 16:14:56 ip-172-31-5-48 systemd[1]: Starting Fail2Ban Service...
Feb 07 16:14:56 ip-172-31-5-48 systemd[1]: Started Fail2Ban Service.
Feb 07 16:14:57 ip-172-31-5-48 fail2ban-server[2016]: Server ready
Make a rules file, and edit it as follows:
$ sudo cp /etc/fail2ban/jail.{conf,local}
$ sudo nano /etc/fail2ban/jail.local
And set the ban time default to 1 day, and the number of retries to 3:
bantime  = 1d
maxretry = 3
And restart the service:
$ sudo systemctl restart fail2ban
Harden sshd for passwordless login
Next edit the sshd configuration to harden the server:
$ sudo nano /etc/ssh/sshd_config
And check the following:
Port 2233
PermitRootLogin no
PubkeyAuthentication yes
PasswordAuthentication no
ChallengeResponseAuthentication no
UsePAM yes
X11Forwarding no
And remember to allow your traffic through the firewall
$ sudo ufw allow 2233/tcp
$ sudo ufw reload
$ sudo ufw status
Status: active

To                         Action      From
--                         ------      ----
22/tcp                     ALLOW       Anywhere
2233/tcp                   ALLOW       Anywhere
22/tcp (v6)                ALLOW       Anywhere (v6)
2233/tcp (v6)              ALLOW       Anywhere (v6)
Then restart sshd, logout and login again
$ sudo systemctl restart sshd
$ logout
Troubleshooting If you see this:
$ ssh -i ./Downloads/aws-ec2-key.pem admin@18.195.111.144
ssh: connect to host 18.195.111.144 port 22: Connection refused
Then you need to use the flag -p 2233 to change the ssh port. If there is no response from the server, check that you added an AWS security group rule to allow traffic on port 2233 (and deny on 22).
$ ssh -i ./Downloads/aws-ec2-key.pem -p 2233 admin@18.195.111.144
Remove port 22 from the firewall rules
List the firewall rules:
$ sudo ufw status numbered
Status: active

     To                         Action      From
     --                         ------      ----
[ 1] 22/tcp                     ALLOW IN    Anywhere
[ 2] 2233/tcp                   ALLOW IN    Anywhere
[ 3] 22/tcp (v6)                ALLOW IN    Anywhere (v6)
[ 4] 2233/tcp (v6)              ALLOW IN    Anywhere (v6)
Now we can remove the ufw rules by number:
$ sudo ufw delete 3
Deleting:
 allow 22/tcp
Proceed with operation (y|n)? y
Rule deleted (v6)

$ sudo ufw status numbered
Status: active

     To                         Action      From
     --                         ------      ----
[ 1] 22/tcp                     ALLOW IN    Anywhere
[ 2] 2233/tcp                   ALLOW IN    Anywhere
[ 3] 2233/tcp (v6)              ALLOW IN    Anywhere (v6)

$ sudo ufw delete 1
Deleting:
 allow 22/tcp
Proceed with operation (y|n)? y
Rule deleted

$ sudo ufw status numbered
Status: active

     To                         Action      From
     --                         ------      ----
[ 1] 2233/tcp                   ALLOW IN    Anywhere
[ 2] 2233/tcp (v6)              ALLOW IN    Anywhere (v6)
Changing the ssh client timeout
I find the default 120 seconds of time out for ssh on the AWS EC2 machines to be too short, I normally increase the time to 600 seconds (10 minutes). This is a simple change to the sshd_config file as follows:
$ sudo nano /etc/ssh/sshd_config
And check the following:
ClientAliveInterval 600
A note about UsePAM option
Many sshd hardening guides will suggest that you set UsePAM no in the sshd_config however in the case of the stock Debian AMI used for AWS the default user is called admin and if we take a look at the admin user properties, we can see that the user is both locked and passwordless:
admin@ip-172-31-15-11:~$ passwd --status admin
admin L 02/08/2022 0 99999 7 -1

admin@ip-172-31-15-11:~$ chage -l admin
Last password change					: Feb 08, 2022
Password expires					: never
Password inactive					: never
Account expires						: never
Minimum number of days between password change		: 0
Maximum number of days between password change		: 99999
Number of days of warning before password expires	: 7

admin@ip-172-31-15-11:~$ sudo usermod -U admin
usermod: unlocking the user's password would result in a passwordless account.
You should set a password with usermod -p to unlock this user's password.
So at this point it is up to you whether you think it is better to set a password for the user admin, with the command passwd -p admin, or whether it is better to delegate to PAM. For me, it is better to set UsePAM yes in the sshd_config file.
Configure sshd host keys
You may have noticed this in the log of your Debian instance:
Feb  8 10:50:25 ip-172-31-25-147 ec2: #############################################################
Feb  8 10:50:25 ip-172-31-25-147 ec2: -----BEGIN SSH HOST KEY FINGERPRINTS-----
Feb  8 10:50:25 ip-172-31-25-147 ec2: 1024 SHA256:TYVPoIaY8FawTkFzGdg/6+E4XDQct5SI8/GVFvIGR0g root@ip-172-31-25-147 (DSA)
Feb  8 10:50:25 ip-172-31-25-147 ec2: 256 SHA256:K8EVYVtYploiPPyRNdo7A4rvNksUbsNRLzp5WsQgJnw root@ip-172-31-25-147 (ECDSA)
Feb  8 10:50:25 ip-172-31-25-147 ec2: 256 SHA256:PueajMOWLpfmdBzK8aNIgnqU4TZpN/AafYEA0e+4GIc root@ip-172-31-25-147 (ED25519)
Feb  8 10:50:25 ip-172-31-25-147 ec2: 3072 SHA256:KDNvuciL/nvmcHVdMR9GA37crUh9GU11mlIl+EXqa7k root@ip-172-31-25-147 (RSA)
Feb  8 10:50:25 ip-172-31-25-147 ec2: -----END SSH HOST KEY FINGERPRINTS-----
Feb  8 10:50:25 ip-172-31-25-147 ec2: #############################################################
256 bit ECDSA host key? Yuk! 1024 bit DSA host key? Double yuk! Let’s take some action:
- Delete the old host keys
- Regenerate the Ed25519 key
- Increase the security of the RSA key to 8192 bits.
$ sudo rm -v /etc/ssh/ssh_host_*
removed '/etc/ssh/ssh_host_dsa_key'
removed '/etc/ssh/ssh_host_dsa_key.pub'
removed '/etc/ssh/ssh_host_ecdsa_key'
removed '/etc/ssh/ssh_host_ecdsa_key.pub'
removed '/etc/ssh/ssh_host_ed25519_key'
removed '/etc/ssh/ssh_host_ed25519_key.pub'
removed '/etc/ssh/ssh_host_rsa_key'
removed '/etc/ssh/ssh_host_rsa_key.pub'
Now, lets recreate the host keys:
$ sudo ssh-keygen -q -t rsa -b 8192 -a 100 -f /etc/ssh/ssh_host_rsa_key -C "" -N ""
$ sudo ssh-keygen -q -t ed25519 -a 100 -f /etc/ssh/ssh_host_ed25519_key -C "" -N ""
Now logout and connect again via ssh to the server.
Troubleshooting You will need to remove the server from the known_hosts file on the local machine, since the machine fingerprints have now changed with the new keys you just generated. When you see this message:
$ ssh -i ./Downloads/aws-ec2-key.pem admin@18.195.111.144
@@@@@@@@@@@@@@@@@@@@@@@@@@@@@@@@@@@@@@@@@@@@@@@@@@@@@@@@@@@
@    WARNING: REMOTE HOST IDENTIFICATION HAS CHANGED!     @
@@@@@@@@@@@@@@@@@@@@@@@@@@@@@@@@@@@@@@@@@@@@@@@@@@@@@@@@@@@
IT IS POSSIBLE THAT SOMEONE IS DOING SOMETHING NASTY!
Someone could be eavesdropping on you right now (man-in-the-middle attack)!
It is also possible that a host key has just been changed.
The fingerprint for the ED25519 key sent by the remote host is
SHA256:dHJRfQo00UdmmLqeS5YScKZ4uKQT3sCcGUYNMY7bCyQ.
Please contact your system administrator.
Add correct host key in /Users/jas/.ssh/known_hosts to get rid of this message.
Offending ECDSA key in /Users/jas/.ssh/known_hosts:11
Host key for 18.195.111.144 has changed and you have requested strict checking.
Host key verification failed.
Then, edit the file /Users/jas/.ssh/known_hosts and delete line 11 (or any other line that refers to 18.195.111.144)
Changing the client side ssh keys
Use the ssh-keygen command on the client side machine to generate a new key that we will install on the EC2 server.
$ ssh-keygen -t rsa -b 8192 -a 100 -f ./aws_ec2_rsa_key -C "admin@debian"
Generating public/private rsa key pair.
Enter passphrase (empty for no passphrase):
Enter same passphrase again:
Your identification has been saved in ./aws_ec2_rsa_key
Your public key has been saved in ./aws_ec2_rsa_key.pub
The key fingerprint is:
SHA256:ft520SToO+wPyuaAq2v1tJslM8mIz7ReQWMFaCCv6KU admin@debian
The key's randomart image is:
+---[RSA 8192]----+
|  . .. ....      |
|   o  o  .       |
|    ..  +    .   |
| . .   o .  . . .|
|. ..    S  .   + |
|. o  ..=.o  . . .|
| E  ..+oX.o... . |
|    .+ +o@.o=..  |
|   .o+* o+=oo+.  |
+----[SHA256]-----+
And do the same for the Ed25519 keys:
$ ssh-keygen -t ed25519 -a 100 -f ./aws_ec2_ed25519_key -C "admin@debian"
Generating public/private ed25519 key pair.
Enter passphrase (empty for no passphrase):
Enter same passphrase again:
Your identification has been saved in ./aws_ec2_ed25519_key
Your public key has been saved in ./aws_ec2_ed25519_key.pub
The key fingerprint is:
SHA256:2tkyGi9SvdTTzpLxQWktokVDzsQFovpgRHq3leuKE7I admin@debian
The key's randomart image is:
+--[ED25519 256]--+
|    .   .o+o.    |
|   o   . *+      |
|  . o o o.o. o   |
|   o o o .o = .  |
|    + ..S+ = .   |
|  ...o.++o+ o    |
|   o o+.*..B .   |
|  E o..=.oo +    |
|    .oo..  .     |
+----[SHA256]-----+
And then we verify:
$ ls -la aws_ec2*
-rw-------  1 jas  staff   399 Feb  8 16:41 aws_ec2_ed25519_key
-rw-r--r--  1 jas  staff    94 Feb  8 16:41 aws_ec2_ed25519_key.pub
-rw-------  1 jas  staff  6497 Feb  8 16:34 aws_ec2_rsa_key
-rw-r--r--  1 jas  staff  1418 Feb  8 16:34 aws_ec2_rsa_key.pub

$ cat aws_ec2_rsa_key.pub
ssh-rsa AAAAB3NzaC1yc2EAAAADAQABAAAEAQDnYyZsNjoD7xCGOCo5L1Tn8jMHaKg6lVA1WdJ6oX0UTTDo4qxRiucNFSDsNYj+3+qWuiRGhn2irVSX4jDr1Vwe4q1OEW6QUWsEQmvCVb1O4obsRXgwUdOd7XhmDKp5CNAI92a3rPRSYi9B0o/gbbOuhblyolXJM7ghvPB+tfXBCYbNg8BNiA0LJl+yGHV+HyGZbXu760E8FOyB9Kt4lwAg0lN3Hrn7os4e9WW1JtdJPfYky9fU+0QtZx6o+3yOM5JzJfF1Yx7LMjzJPJWsegHnUoSdZHAuAmdS2Q2OOodIDN6iigMIDJU4vPZLFBpjykQ1vXGl2yKKZRfkNh+8EJy2TCTJXrcCiA6uzeT61yjMmlSPMkH9rTh5x81oygG01L1f5M5LHxSm0+SWsrFnGNn14tOw/TT304whWay1yBs10Y6k581q6oLE2FcXXPpeQN1SYBuR+WdMwodKs9FHat/CxOPw9pjN6/vGoRAU0O0K0vBifNqOUuTwp6IycuwBgS54nKBt9Ww2c4UQKuOGtwCzwNjJXNOSJe2De4VTWhvdorEXl8KdkqoP9LRuTrJ29lFdb8oqs+jjVgSWkdfWSBD9kD4YxnqmwcPeC1DUp4iTdLehf5PQqo70EJkCPlE/o8AbMSkQyBE9pkOkyhyhOFkDWzyj+Ht82I/yZEqWOktmrNjgsIy/Es9MPTT1qGl6FOu1aEfhX/76arGi0+occOdKG1nrjPhPoQ6P8JkawTbDFRVjTjReCtnV4WAt2UmgdOzOxep13slBhxoNfpxhF6SFN9poxF0WieIioc1lYTohzuiBemW9OoeDQHXru845HGtrwPJbNlTLu5A/i2VvPD507ThwWpi1nGp1kVzy5LJJzmEMce+/3Ms4BfVtQpvo/DZ/YUIM4Lt63l+b49rOwZBo8lc1kDFGT5eKB1lEkh9zUYk4n2e7Mn+387YUB5rr6aR0KcGCm6nA0dcT6/WaO6t+dG7Gi9xWlrTSdE1HXPvwkj3aEljzVeF3fQmaWqeKREC28OBVIOQpon2H1pri3asREfQxPndRkufKAI8FDXl1QLuuHjxFAPYNUo5A36fsa+NwkgCUdM45uyxCGMGk9QP5/Jpz3b5T6M4thx1/IytbeWf4csn1bjEt8iaz0Wj4PTv5CeV0YH4GnjzmDIW8DsrE5LpaUgq7QWryk2HSatFgQTEZib5zqhqA+e+qjbenpj4P1bRbLh8G+A4uuBoEvkR0qpaYARrLlRRVmJ9b14RoIJYwS4PyS0eQj9IWtiTf//kCL6Smgpa+uZCjZJeQ4mExmxW5knTi5h9EqD2ylIws0NSCqdhVNnY5mdipQKVu0Zj0qJE2f6YtLwRtg8zcO7GT admin@debian

$ cat aws_ec2_ed25519_key.pub
ssh-ed25519 AAAAC3NzaC1lZDI1NTE5AAAAIP2nKgNZYinDjmsQf2J6FHKk/lxi2iAC32carLKtLo9y admin@debian
Now simply take the contents of the .pub key files above and copy their contents to the server side file $HOME/.ssh/authorized_keys
$ nano $HOME/.ssh/authorized_keys
Copy the public key file contents:
ssh-ed25519 AAAAC3NzaC1lZDI1NTE5AAAAIP2nKgNZYinDjmsQf2J6FHKk/lxi2iAC32carLKtLo9y admin@debian
Logout of the server and then you can use your new key to log in:
$ ssh -i aws_ec2_ed25519_key -p 2233 admin@18.195.111.144
Or
$ ssh -i aws_ec2_rsa_key -p 2233 admin@18.195.111.144
Personally, I prefer to use the Ed25519 keys, they are faster smaller and more secure since Elliptic Curve is a different type of maths problem to solve compared to normal Finite Field Diffie-Hellman.
Troubleshooting If you see this:
$ ssh -i ./Downloads/aws-ec2-key.pem -p 2233 admin@18.195.111.144
admin@18.195.111.144: Permission denied (publickey).
then you are still using the old key, and need to switch to the new ones!
Install Wireguard VPN
For the Wireguard installation on Debian we are going to assume that you have a Debian Linux machine as a server (the AWS EC2 instance) and a Debian Linux machine as a client at home (your desktop). Log into your Debian EC2 server. WireGuard is included in the Debian 11 (Bullseye) repository, so you can run the following commands to install it.
$ sudo apt update
$ sudo apt install wireguard wireguard-tools linux-headers-$(uname -r)
Debian 10 users will however need to add the backport repository with the following command.
$ echo "deb http://deb.debian.org/debian buster-backports main" | sudo tee /etc/apt/sources.list.d/buster-backports.list
Then install WireGuard.
$ sudo apt update
$ sudo apt -t buster-backports install wireguard wireguard-tools wireguard-dkms linux-headers-$(uname -r)
Use the same commands to install WireGuard on your local Debian client.
Generate Wireguard Keypairs
On the Server
Run the following command on the Debian server to create a public/private key pair, which will be saved under /etc/wireguard/ directory.
$ sudo mkdir -p /etc/wireguard
$ sudo chmod 700 /etc/wireguard
$ wg genkey | sudo tee /etc/wireguard/server_private.key | wg pubkey | sudo tee /etc/wireguard/server_public.key
On the Client
Run the following command to create a public/private key pair on the local Debian VPN client.
$ sudo mkdir -p /etc/wireguard
$ sudo chmod 700 /etc/wireguard
$ wg genkey | sudo tee /etc/wireguard/client_private.key | wg pubkey | sudo tee /etc/wireguard/client_public.key
Create WireGuard Configuration File for Server
Using wg0 as the network interface name.
$ sudo nano /etc/wireguard/wg0.conf
Copy the following text and paste it to your configuration file. You need to use your own server private key and client public key.
[Interface]
Address = 10.10.10.1/24
ListenPort = 51820
PrivateKey = <server private key here>

[Peer]
PublicKey = <client public key here>
AllowedIPs = 10.10.10.2/32
And set the file permissions
$ sudo chmod 600 /etc/wireguard/ -R
Configuration Variables
Address: Specify the private IP address of the VPN server. Here I’m using the
10.10.10.0/24network range, so it won’t conflict with your home network range. (Most home routers use192.168.0.0/24or192.168.1.0/24).10.10.10.1is the private IP address for the VPN server.PrivateKey: The private key of VPN server, which can be found in the
/etc/wireguard/server_private.keyfile on the server.ListenPort: WireGuard VPN server will be listening on
51820/UDP, which is the default.PublicKey: The public key of VPN client, which can be found in the
/etc/wireguard/client_public.keyfile on the client computer.AllowedIPs: IP addresses the VPN client is allowed to use. In this example, the client can only use the 10.10.10.2 IP address inside the VPN tunnel.
Commandline IP address information via curl
Run this on the EC2 server to find your server IP address from the command line:
$ curl ipinfo.io
{
  "ip": "18.195.111.144",
  "hostname": "ec2-18-193-47-75.eu-central-1.compute.amazonaws.com",
  "city": "Frankfurt am Main",
  "region": "Hesse",
  "country": "DE",
  "loc": "50.1025,8.6299",
  "org": "AS16509 Amazon.com, Inc.",
  "postal": "60326",
  "timezone": "Europe/Berlin",
  "readme": "https://ipinfo.io/missingauth"
}
If we just want the IP then we can run this:
$ curl ipinfo.io/ip
18.195.111.144
Create WireGuard Configuration File for Client
Using wg-client0 as the network interface name.
$ sudo nano /etc/wireguard/wg-client0.conf
Copy the following text and paste it to your configuration file. You need to use your own server private key and client public key.
[Interface]
Address = 10.10.10.2/32
DNS = 10.10.10.1
PrivateKey = <client private key here>

[Peer]
PublicKey = <server public key here>
AllowedIPs = 0.0.0.0/0
Endpoint = <public ip/fqdn of server>:51820
PersistentKeepalive = 25
Configuration Variables
Address: Specify the private IP address of the VPN client.
DNS: specify
10.10.10.1(the VPN server) as the DNS server. It will be configured via the resolvconf command. You can also specify multiple DNS servers for redundancy like this:DNS = 10.10.10.1 8.8.8.8PrivateKey: The client’s private key, which can be found in the
/etc/wireguard/client_private.keyfile on the client computer.PublicKey: The server’s public key, which can be found in the
/etc/wireguard/server_public.keyfile on the server.AllowedIPs:
0.0.0.0/0represents the whole Internet, which means all traffic to the Internet should be routed via the VPN.Endpoint: The public IP address or the FQDN and the port number of VPN server. From the
curlcommand above we can see that our AWS assigned IP is:18.195.111.144PersistentKeepalive: Send an authenticated empty packet to the peer every 25 seconds to keep the connection alive. If
PersistentKeepaliveisn’t enabled, the VPN server might not be able to ping the VPN client.
Then set the file permissions
$ sudo chmod 600 /etc/wireguard/ -R
Enable IP Forwarding on the Server
In order for the VPN server to route packets between VPN clients and the Internet, we need to enable IP forwarding. Edit sysctl.conf file.
$ sudo nano /etc/sysctl.conf
Add the following line at the end of this file.
net.ipv4.ip_forward = 1
Save and close the file. Then apply the changes with the below command. The -p option will load sysctl settings from /etc/sysctl.conf file. This command will preserve our changes across system reboots.
$ sudo sysctl -p
Configure IP Masquerading on the Server
We need to set up IP masquerading in the server firewall, so that the server becomes a virtual router for VPN clients. We will use UFW for this task, which we installed earlier. First find the interface name:
$ ip addr
1: lo: <LOOPBACK,UP,LOWER_UP> mtu 65536 qdisc noqueue state UNKNOWN group default qlen 1000
    link/loopback 00:00:00:00:00:00 brd 00:00:00:00:00:00
    inet 127.0.0.1/8 scope host lo
       valid_lft forever preferred_lft forever
    inet6 ::1/128 scope host
       valid_lft forever preferred_lft forever
2: ens5: <BROADCAST,MULTICAST,UP,LOWER_UP> mtu 9001 qdisc mq state UP group default qlen 1000
    link/ether 0a:2c:03:a0:2b:d6 brd ff:ff:ff:ff:ff:ff
    altname enp0s5
    inet 172.31.7.19/20 brd 172.31.15.255 scope global dynamic ens5
       valid_lft 3264sec preferred_lft 3264sec
    inet6 fe80::82c:3ff:fea0:2bd6/64 scope link
       valid_lft forever preferred_lft forever
So, our interface is ens5. Now, let’s add the masquerade firewall rule:
$ sudo nano /etc/ufw/before.rules
By default, there are some rules for the filter table. Add the following lines after the COMMIT line at the end of this file. Replace ens5 with your own network interface name.
# NAT table rules
*nat
:POSTROUTING ACCEPT [0:0]
-A POSTROUTING -o ens5 -j MASQUERADE

# End each table with the 'COMMIT' line or these rules won't be processed
COMMIT
The above lines will append -A a rule to the end of of POSTROUTING chain of nat table. It will link your virtual private network with the Internet. And also hide your network from the outside world. So the Internet can only see your VPN server’s IP, but can’t see your VPN client’s IP, just like your home router hides your private home network.
By default, UFW forbids packet forwarding. We can allow forwarding for our private network. Find the ufw-before-forward chain in this file and add the following 3 lines, which will accept packet forwarding if the source IP or destination IP is in the 10.10.10.0/24 range.
# allow forwarding for trusted network
-A ufw-before-forward -s 10.10.10.0/24 -j ACCEPT
-A ufw-before-forward -d 10.10.10.0/24 -j ACCEPT
Reload the firewall to check that the rules are okay:
$ sudo ufw enable
Command may disrupt existing ssh connections. Proceed with operation (y|n)? y
Firewall is active and enabled on system startup

$ sudo ufw reload
Firewall reloaded
And check that masquerade is enabled in the POSTROUTING chain:
$ sudo iptables -t nat -L POSTROUTING
Chain POSTROUTING (policy ACCEPT)
target     prot opt source               destination
MASQUERADE  all  --  anywhere             anywhere
Install unbound DNS server on the AWS instance
I like unbound, let’s install unbound DNS on the Debian server and configure it:
$ sudo apt update && sudo apt -qy install unbound
$ sudo systemctl status unbound
● unbound.service - Unbound DNS server
     Loaded: loaded (/lib/systemd/system/unbound.service; enabled; vendor preset: enabled)
     Active: active (running) since Thu 2022-02-10 14:00:22 UTC; 1min 13s ago
       Docs: man:unbound(8)
   Main PID: 7796 (unbound)
      Tasks: 1 (limit: 1118)
     Memory: 8.8M
        CPU: 58ms
     CGroup: /system.slice/unbound.service
             └─7796 /usr/sbin/unbound -d -p

Feb 10 14:00:22 ip-172-31-7-19 systemd[1]: Starting Unbound DNS server...
Feb 10 14:00:22 ip-172-31-7-19 package-helper[7792]: /var/lib/unbound/root.key does not exist, copying from /usr/share/dns/root.key
Feb 10 14:00:22 ip-172-31-7-19 unbound[7796]: [7796:0] notice: init module 0: subnet
Feb 10 14:00:22 ip-172-31-7-19 unbound[7796]: [7796:0] notice: init module 1: validator
Feb 10 14:00:22 ip-172-31-7-19 unbound[7796]: [7796:0] notice: init module 2: iterator
Feb 10 14:00:22 ip-172-31-7-19 systemd[1]: Started Unbound DNS server.
Feb 10 14:00:22 ip-172-31-7-19 unbound[7796]: [7796:0] info: start of service (unbound 1.13.1).
Feb 10 14:00:23 ip-172-31-7-19 unbound[7796]: [7796:0] info: generate keytag query _ta-4f66. NULL IN
Note that you also need to install the resolvconf package on the client to configure DNS server. Also install tools like dig and nslookup to test our server.
$ sudo apt update && sudo apt -qy install resolvconf dnsutils
Now let’s make sure that we are not running a Bind9 service (or any other resolver) on the server by default:
$ sudo systemctl disable named --now
Failed to disable unit: Unit file named.service does not exist.
$ sudo systemctl disable systemd-resolved --now
Configure unbound on the AWS instance
Create a new configuration for the DNS server configuration:
$ sudo nano /etc/unbound/unbound.conf.d/server.conf
And add these contents:
server:
        directory: "/etc/unbound"
        username: unbound
        verbosity: 2
        interface: 0.0.0.0
        interface: 127.0.0.1
        access-control: 10.10.10.0/24 allow
        access-control: 127.0.0.1 allow
        aggressive-nsec: yes
        cache-max-ttl: 14400
        cache-min-ttl: 300
        do-not-query-localhost: no
        hide-identity: yes
        hide-version: yes
        harden-glue: yes
        minimal-responses: yes
        prefetch: yes
        qname-minimisation: yes
        rrset-roundrobin: yes
        use-caps-for-id: yes
        port: 53
        do-ip4: yes
        do-ip6: no
        do-tcp: yes
        do-udp: yes
        num-threads: 1
        unwanted-reply-threshold: 10000

forward-zone:
        name: "."
#        forward-addr: 208.67.222.222  # IP of OpenDNS #1 resolver
#        forward-addr: 208.67.220.220  # IP of OpenDNS #2 resolver
        forward-addr: 9.9.9.9         # Upstream Quad9 resolver
And start the service
$ sudo systemctl enable unbound
$ sudo systemctl start unbound
And check that we are listening:
$ sudo ss -lnptu | grep 53
udp   UNCONN 0      0                           127.0.0.1:53        0.0.0.0:*    users:(("unbound",pid=8381,fd=5))
udp   UNCONN 0      0                             0.0.0.0:53        0.0.0.0:*    users:(("unbound",pid=8381,fd=3))
tcp   LISTEN 0      256                         127.0.0.1:8953      0.0.0.0:*    users:(("unbound",pid=8381,fd=7))
tcp   LISTEN 0      256                         127.0.0.1:53        0.0.0.0:*    users:(("unbound",pid=8381,fd=6))
tcp   LISTEN 0      256                           0.0.0.0:53        0.0.0.0:*    users:(("unbound",pid=8381,fd=4))
Set up localhost as our default DNS resolver on AWS by creating a new systemd job:
$ sudo nano /etc/systemd/system/unbound-resolvconf.service
Add the following contents:
[Unit]
Description=local unbound via resolvconf
After=unbound.service
ConditionFileIsExecutable=/sbin/resolvconf

[Service]
Type=oneshot
RemainAfterExit=yes
ExecStart=/bin/sh -c 'echo nameserver 127.0.0.1 | /sbin/resolvconf -a lo.unbound'
ExecStop=/sbin/resolvconf -d lo.unbound

[Install]
WantedBy=unbound.service
Save and close this file. Then reload systemd. Restart the service. And check /etc/resolv.conf:
$ sudo systemctl daemon-reload
$ sudo systemctl restart unbound-resolvconf.service
$ cat /etc/resolv.conf
# Dynamic resolv.conf(5) file for glibc resolver(3) generated by resolvconf(8)
#     DO NOT EDIT THIS FILE BY HAND -- YOUR CHANGES WILL BE OVERWRITTEN
# 127.0.0.53 is the systemd-resolved stub resolver.
# run "resolvectl status" to see details about the actual nameservers.

nameserver 127.0.0.1
search eu-central-1.compute.internal
Test our DNS system:
$ nslookup google.com
Server:		127.0.0.1
Address:	127.0.0.1#53

Non-authoritative answer:
Name:	google.com
Address: 142.250.184.206
Name:	google.com
Address: 2a00:1450:4001:810::200e
And as we can see, we are serving from 127.0.0.1 port 53, excellent!
Testing with dig:
$ dig redhat.com +noall +answer
redhat.com.		2083	IN	A	209.132.183.105

$ dig redhat.com  MX +noall +answer
redhat.com.		600	IN	MX	10 us-smtp-inbound-2.mimecast.com.
redhat.com.		600	IN	MX	10 us-smtp-inbound-1.mimecast.com.

$ dig redhat.com NS +noall +answer
redhat.com.		3600	IN	NS	a9-65.akam.net.
redhat.com.		3600	IN	NS	a10-65.akam.net.
redhat.com.		3600	IN	NS	a1-68.akam.net.
redhat.com.		3600	IN	NS	a13-66.akam.net.
redhat.com.		3600	IN	NS	a16-67.akam.net.
redhat.com.		3600	IN	NS	a28-64.akam.net.

$ dig redhat.com +short
209.132.183.105

$ dig -x 209.132.183.105 +short
redirect.redhat.com.

$ dig -x 209.132.183.81 +short
www.redhat.com.
Allow VPN traffic through the firewall
Add a firewall rule for DNS on the VPN, and for the Wireguard port
$ sudo ufw allow in from 10.0.0.0/8 to any port 53
$ sudo ufw allow 51820/udp
$ sudo ufw status numbered
Status: active

     To                         Action      From
     --                         ------      ----
[ 1] 2233/tcp                   ALLOW IN    Anywhere
[ 2] 53                         ALLOW IN    10.0.0.0/8
[ 3] 51820/udp                  ALLOW IN    Anywhere
[ 4] 2233/tcp (v6)              ALLOW IN    Anywhere (v6)
[ 5] 51820/udp (v6)             ALLOW IN    Anywhere (v6)
IMPORTANT If you didn’t yet edit your AWS EC2 instance security rules in the AWS panel to allow 51820/udp then you should do that now.
IMPORTANT Do not allow 10.0.0.0/8 in the AWS firewall, this is a virtual network formed on the VPN.
Connect the VPN client to the server
On the server
Run the following command on the server to start WireGuard.
$ sudo wg-quick up /etc/wireguard/wg0.conf
[#] ip link add wg0 type wireguard
[#] wg setconf wg0 /dev/fd/63
[#] ip -4 address add 10.10.10.1/24 dev wg0
[#] ip link set mtu 8921 up dev wg0
To stop it, run:
$ sudo wg-quick down /etc/wireguard/wg0.conf
[#] ip link delete dev wg0
You can also use systemd service to start WireGuard:
$ sudo systemctl start wg-quick@wg0.service
Enable auto-start at system boot time.
$ $ sudo systemctl enable wg-quick@wg0.service
Created symlink /etc/systemd/system/multi-user.target.wants/wg-quick@wg0.service → /lib/systemd/system/wg-quick@.service.
Check its status with the following command. Its status should be active (exited).
$ systemctl status wg-quick@wg0.service
● wg-quick@wg0.service - WireGuard via wg-quick(8) for wg0
     Loaded: loaded (/lib/systemd/system/wg-quick@.service; enabled; vendor preset: enabled)
     Active: active (exited) since Thu 2022-02-10 15:46:09 UTC; 32s ago
       Docs: man:wg-quick(8)
             man:wg(8)
             https://www.wireguard.com/
             https://www.wireguard.com/quickstart/
             https://git.zx2c4.com/wireguard-tools/about/src/man/wg-quick.8
             https://git.zx2c4.com/wireguard-tools/about/src/man/wg.8
   Main PID: 10284 (code=exited, status=0/SUCCESS)
      Tasks: 0 (limit: 1118)
     Memory: 0B
        CPU: 0
     CGroup: /system.slice/system-wg\x2dquick.slice/wg-quick@wg0.service

Feb 10 15:46:08 ip-172-31-7-19 systemd[1]: Starting WireGuard via wg-quick(8) for wg0...
Feb 10 15:46:08 ip-172-31-7-19 wg-quick[10284]: [#] ip link add wg0 type wireguard
Feb 10 15:46:08 ip-172-31-7-19 wg-quick[10284]: [#] wg setconf wg0 /dev/fd/63
Feb 10 15:46:09 ip-172-31-7-19 wg-quick[10284]: [#] ip -4 address add 10.10.10.1/24 dev wg0
Feb 10 15:46:09 ip-172-31-7-19 wg-quick[10284]: [#] ip link set mtu 8921 up dev wg0
Feb 10 15:46:09 ip-172-31-7-19 systemd[1]: Finished WireGuard via wg-quick(8) for wg0.
Now the AWS EC2 WireGuard server is ready to accept client connections.
On the client
Remember that we are using a Debian Linux client here, so:
$ curl ipinfo.io
{
  "ip": "212.50.98.198",
  "hostname": "bcable.lar.cablenet-as.net",
  "city": "Larnaca",
  "region": "Larnaka",
  "country": "CY",
  "loc": "34.9229,33.6233",
  "org": "AS35432 Cablenet Communication Systems plc",
  "postal": "6036",
  "timezone": "Asia/Nicosia",
  "readme": "https://ipinfo.io/missingauth"
}
Yeah, that’s my office in Larnaca. Now, let’s connect to the VPN. Start WireGuard.
$ sudo systemctl start wg-quick@wg-client0.service
Enable auto-start at system boot time.
$ sudo systemctl enable wg-quick@wg-client0.service
Created symlink /etc/systemd/system/multi-user.target.wants/wg-quick@wg-client0.service → /lib/systemd/system/wg-quick@.service.
Check the Wireguard VPN status:
$ systemctl status wg-quick@wg-client0.service
● wg-quick@wg-client0.service - WireGuard via wg-quick(8) for wg/client0
   Loaded: loaded (/lib/systemd/system/wg-quick@.service; enabled; vendor preset: enabled)
   Active: active (exited) since Thu 2022-02-10 17:49:33 EET; 11s ago
     Docs: man:wg-quick(8)
           man:wg(8)
           https://www.wireguard.com/
           https://www.wireguard.com/quickstart/
           https://git.zx2c4.com/wireguard-tools/about/src/man/wg-quick.8
           https://git.zx2c4.com/wireguard-tools/about/src/man/wg.8
 Main PID: 4888 (code=exited, status=0/SUCCESS)
    Tasks: 0 (limit: 4915)
   Memory: 0B
   CGroup: /system.slice/system-wg\x2dquick.slice/wg-quick@wg-client0.service
Blocking adservers with unbound
One of the big advantages of using our own DNS is that we can sink hole all the shitty adservers on the web, and be left with a much cleaner browsing experience. Pop this script into your home directory on the AWS EC2 server, make it executable, and run it. Then marvel at the missing ads in the web pages as you browse using the VPN :)
$ cat ./refresh-adservers.sh
#!/usr/bin/env bash

# Check if we are root
if [[ $EUID -ne 0 ]]; then
   echo "This script must be run as root" && exit 1
fi
# Backup the local copy
mv adservers.conf adservers-$(date +"%Y-%m-%d").conf
# Grab a copy of the adservers list
curl "https://pgl.yoyo.org/adservers/serverlist.php?hostformat=unbound&showintro=0&startdate%5Bday%5B=&startdate%5Bmonth%5B=&startdate%5Byear%5B=&mimetype=plaintext" --output adservers.conf
# Insert a tab before every line in the file
sed -i 's/^/\t\t/' adservers.conf
# Insert the word `server:` at the top of the file so we know which section it is part of
sed -i '1 i\server:' adservers.conf
# Copy the file to the unbound working directory
cp adservers.conf /etc/unbound/unbound.conf.d/
# And restart the server
systemctl restart unbound
Now we can run it:
$ chmod +x ./refresh-adservers.sh
$ sudo ./refresh-adservers.sh
  % Total    % Received % Xferd  Average Speed   Time    Time     Time  Current
                                 Dload  Upload   Total   Spent    Left  Speed
100  294k    0  294k    0     0  1619k      0 --:--:-- --:--:-- --:--:-- 1619k
And notice how all of the interstitial and banner ads have been removed from your favorite web pages when surfing with the EC2 VPN
On-boarding mobile devices with QR codes
It is a real pain in the ass trying to type in those private/public key files on a mobile device. Instead, let’s use QR codes!
Also, many people will recommend that you run these commands on your VPN server. But personally I recommend installing the software, then disconnecting it from the web and using strong OPSEC to generate the client keys on a separate laptop and distributing them in a safe way (GPG encrypted to the client).
Install the qrencode software:
$ sudo apt update && sudo apt -qy install qrencode
Now create a new client key for the iPhone client Wireguard configuration:
$ export KEY_DIR=/etc/wireguard/clients
$ sudo mkdir -p ${KEY_DIR}
$ export CLIENT_NAME=dave_iphone
$ wg genkey | sudo tee ${KEY_DIR}/${CLIENT_NAME}.key | tee cat | wg pubkey | sudo tee ${KEY_DIR}/${CLIENT_NAME}.key.pub
Make a client configuration file as follows:
$ sudo nano ${KEY_DIR}/${CLIENT_NAME}.conf
And insert the contents (changing the keys/server-ip/client-address for your own values):
[Interface]
Address = 10.10.10.11/32
DNS = 10.10.10.1
PrivateKey = YBYfdl0GdTq7ZcaxSW9pGOppq4kuoaKfvxTb97SMNVk=

[Peer]
PublicKey = yb7gESqxW7JDCaCqGW8c3IQTYVztwHzCDu9TSp8IlR0=
AllowedIPs = 0.0.0.0/0  # To allow the client to pass all traffic thru the VPN
Endpoint = 18.193.47.75:51820
PersistentKeepalive = 25
Add the new client to the server configuration in /etc/wireguard/wg0.conf:
[Interface]
Address = 10.10.10.1/32
PrivateKey = UIFH+XXjJ0g0uAZJ6vPqsbb/o68SYVQdmYJpy/FlGFA=
ListenPort = 51820

[Peer]
PublicKey = 75VNV7HqFh+3QIT5OHZkcjWfbjx8tc6Ck62gZJT/KRA=
AllowedIPs = 10.10.10.10/32

[Peer]
PublicKey = YYh4/1Z/3rtl0i7cJorcinB7T4UOIzScifPNEIESFD8=
AllowedIPs = 10.10.10.11/32
And restart the server:
$ sudo systemctl restart wg-quick@wg0.service
Now we can print the QR code that we can use with our mobile client:
$ sudo qrencode -t ansiutf8 < ${KEY_DIR}/${CLIENT_NAME}.conf
Linux client VPN kill-switch
By default, your computer can access the Internet via the normal gateway when the VPN connection is disrupted. You may want to enable the kill switch feature, which prevents the flow of unencrypted packets through non-WireGuard interfaces.
Stop the WireGuard client process and edit the client configuration file.
$ sudo systemctl stop wg-quick@wg-client0.service
$ sudo nano /etc/wireguard/wg-client0.conf
Add the following two lines in the [interface] section.
PostUp = iptables -I OUTPUT ! -o %i -m mark ! --mark $(wg show %i fwmark) -m addrtype ! --dst-type LOCAL -j REJECT
PreDown = iptables -D OUTPUT ! -o %i -m mark ! --mark $(wg show %i fwmark) -m addrtype ! --dst-type LOCAL -j REJECT
Like this:
[Interface]
Address = 10.10.10.2/24
DNS = 10.10.10.1
PrivateKey = cOFA+x5UvHF+a3xJ6enLatG+DoE3I5PhMgKrMKkUyXI=
PostUp = iptables -I OUTPUT ! -o %i -m mark ! --mark $(wg show %i fwmark) -m addrtype ! --dst-type LOCAL -j REJECT
PreDown = iptables -D OUTPUT ! -o %i -m mark ! --mark $(wg show %i fwmark) -m addrtype ! --dst-type LOCAL -j REJECT

[Peer]
PublicKey = kQvxOJI5Km4S1c7WXu2UZFpB8mHGuf3Gz8mmgTIF2U0=
AllowedIPs = 0.0.0.0/0
Endpoint = 12.34.56.78:51820
PersistentKeepalive = 25
Save and close the file. Then start the WireGuard client.
$ sudo systemctl start wg-quick@wg-client0.service
Connecting to our domain name
So, at the start of this post we acquired a domain name for use in our VPN system. Now, we want to be able to find our VPN on the network using that domain name. This can be done in one of two ways.
Make a CNAME record and alias the aws domain name
In the AWS EC2 control panel we have already been given a long AWS domain name for our instance. It is something like: ec2-18-193-47-75.eu-central-1.compute.amazonaws.com.
If we open the Route53 control panel, we can create a CNAME record in our hosted zone and point our new short domain name to this DNS entry, basically an alias name.
So, open the Route53 control panel. Choose hosted zone. Choose your domain name. And select Create Record.
I added a Record Name of vpn, so that the DNS entry will be vpn.domain.link, and then added a record type of CNAME and the info section was set to ec2-18-193-47-75.eu-central-1.compute.amazonaws.com. Save and give it ten seconds to propagate…
On a client device now we can do this:
$ nslookup vpn.domain.link
Server:		172.20.2.1
Address:	172.20.2.1#53

Non-authoritative answer:
vpn.domain.link   canonical name = ec2-18-193-47-75.eu-central-1.compute.amazonaws.com.
Name:   ec2-18-193-47-75.eu-central-1.compute.amazonaws.com
Address:   18.193.47.75
Superb!
Make an A record and redirect to the IP address
To do this correctly you need to purchase an elastic IP from AWS. Then assin that IP to your instance. Then go through the process above, but connect your domain to the IP address via an A record. Easy!
But, watch out, AWS Elastic IP can get expensive.
Encrypted DNS lookups
Even though we have our own caching DNS server on the AWS EC2 instance, it is still just asking Quad9 for the DNS entries and passing them to our VPN clients. And this traffic is standard UDP plain old DNS traffic. There is no privacy involved. We prefer privacy in our systems, so, let’s install `dnscrypt-proxy`` on the server.
$ sudo apt install dnscrypt-proxy
Now, the firth thing that we are going to see is an error message:
A dependency job for dnscrypt-proxy-resolvconf.service failed.
This is because dnscrypt-proxy is trying to bind to socket 127.0.0.1:53, which as we know, we have just done some major work to put unbound on that socket and make it available to the VPN. So, what we want to do is reconfigure dnscrypt-proxy onto port 5353, and then point to that service from unbound. For this we need to edit the systemd .socket job:
$ sudo nano /lib/systemd/system/dnscrypt-proxy.socket
And change the following:
[Socket]
ListenStream=127.0.2.1:5353
ListenDatagram=127.0.2.1:5353
Now restart the socket manually:
$ sudo systemctl disable dnscrypt-proxy.socket
Removed /etc/systemd/system/sockets.target.wants/dnscrypt-proxy.socket.

$ sudo systemctl enable dnscrypt-proxy.socket
Created symlink /etc/systemd/system/sockets.target.wants/dnscrypt-proxy.socket → /lib/systemd/system/dnscrypt-proxy.socket.
What we want to do now is add some configuration for the dnscrypt-proxy system to choose some servers we like. Edit the configuration:
$ sudo nano /etc/dnscrypt-proxy/dnscrypt-proxy.toml
Add the following:
# Choose some servers from https://dnscrypt.info/public-servers/
server_names = ['cs-austria', 'cs-barcelona', 'cs-belgium', 'cs-berlin', 'cs-bulgaria', 'cs-czech', 'cs-de', 'cs-dk']

# Use servers reachable over IPv4
ipv4_servers = true

# Use servers reachable over IPv6 -- Do not enable if you don't have IPv6 connectivity
ipv6_servers = false

# Use servers implementing the DNSCrypt protocol
dnscrypt_servers = true

# Use servers implementing the DNS-over-HTTPS protocol
doh_servers = false

# Server must support DNS security extensions (DNSSEC)
require_dnssec = false

# Server must not log user queries (declarative)
require_nolog = true

# Server must not enforce its own blocklist (for parental control, ads blocking...)
require_nofilter = true
$ sudo systemctl restart dnscrypt-proxy

$ sudo systemctl status dnscrypt-proxy
● dnscrypt-proxy.service - DNSCrypt client proxy
     Loaded: loaded (/lib/systemd/system/dnscrypt-proxy.service; enabled; vendor preset: enabled)
     Active: active (running) since Fri 2022-02-11 16:09:28 UTC; 2s ago
TriggeredBy: ● dnscrypt-proxy.socket
       Docs: https://github.com/DNSCrypt/dnscrypt-proxy/wiki
   Main PID: 14669 (dnscrypt-proxy)
      Tasks: 7 (limit: 1118)
     Memory: 4.7M
        CPU: 19ms
     CGroup: /system.slice/dnscrypt-proxy.service
             └─14669 /usr/sbin/dnscrypt-proxy -config /etc/dnscrypt-proxy/dnscrypt-proxy.toml

Feb 11 16:09:28 ip-172-31-7-19 systemd[1]: Started DNSCrypt client proxy.
Feb 11 16:09:28 ip-172-31-7-19 dnscrypt-proxy[14669]: [2022-02-11 16:09:28] [NOTICE] dnscrypt-proxy 2.0.45
Feb 11 16:09:28 ip-172-31-7-19 dnscrypt-proxy[14669]: [2022-02-11 16:09:28] [NOTICE] Network connectivity detected
Feb 11 16:09:28 ip-172-31-7-19 dnscrypt-proxy[14669]: [2022-02-11 16:09:28] [NOTICE] Now listening to 127.0.0.1:5353 [UDP]
Feb 11 16:09:28 ip-172-31-7-19 dnscrypt-proxy[14669]: [2022-02-11 16:09:28] [NOTICE] Now listening to 127.0.0.1:5353 [TCP]
And test it is all working by checking for processes that are listening on port 53 or 5353:
$ sudo ss -lnptu | grep 53
udp   UNCONN 0      0                           127.0.0.1:53         0.0.0.0:*    users:(("unbound",pid=14789,fd=5))
udp   UNCONN 0      0                             0.0.0.0:53         0.0.0.0:*    users:(("unbound",pid=14789,fd=3))
udp   UNCONN 0      0                           127.0.0.1:5353       0.0.0.0:*    users:(("dnscrypt-proxy",pid=14669,fd=8))
udp   UNCONN 0      0                           127.0.2.1:5353       0.0.0.0:*    users:(("dnscrypt-proxy",pid=14669,fd=11),("systemd",pid=1,fd=66))
tcp   LISTEN 0      256                         127.0.0.1:8953       0.0.0.0:*    users:(("unbound",pid=14789,fd=7))
tcp   LISTEN 0      4096                        127.0.0.1:5353       0.0.0.0:*    users:(("dnscrypt-proxy",pid=14669,fd=9))
tcp   LISTEN 0      4096                        127.0.2.1:5353       0.0.0.0:*    users:(("dnscrypt-proxy",pid=14669,fd=10),("systemd",pid=1,fd=54))
tcp   LISTEN 0      256                         127.0.0.1:53         0.0.0.0:*    users:(("unbound",pid=14789,fd=6))
tcp   LISTEN 0      256                           0.0.0.0:53         0.0.0.0:*    users:(("unbound",pid=14789,fd=4))
And we can try digging the local server with a dns query:
$ dig @127.0.0.1 -p5353 bbc.com

; <<>> DiG 9.16.22-Debian <<>> @127.0.0.1 -p5353 bbc.com
; (1 server found)
;; global options: +cmd
;; Got answer:
;; ->>HEADER<<- opcode: QUERY, status: NOERROR, id: 55244
;; flags: qr rd ra; QUERY: 1, ANSWER: 4, AUTHORITY: 0, ADDITIONAL: 1

;; OPT PSEUDOSECTION:
; EDNS: version: 0, flags:; udp: 512
;; QUESTION SECTION:
;bbc.com.			IN	A

;; ANSWER SECTION:
bbc.com.		299	IN	A	151.101.192.81
bbc.com.		299	IN	A	151.101.128.81
bbc.com.		299	IN	A	151.101.64.81
bbc.com.		299	IN	A	151.101.0.81

;; Query time: 4 msec
;; SERVER: 127.0.0.1#5353(127.0.0.1)
;; WHEN: Fri Feb 11 16:17:04 UTC 2022
;; MSG SIZE  rcvd: 100

$ dig @127.0.0.1 -p5353 bbc.com +short
151.101.192.81
151.101.128.81
151.101.64.81
151.101.0.81
Let’s check the query log, and see which servers we used:
$ sudo cat /var/log/dnscrypt-proxy/query.log
[2022-02-11 16:17:04]	127.0.0.1	bbc.com	A	PASS	4ms	cs-de
[2022-02-11 16:17:15]	127.0.0.1	bbc.com	A	PASS	0ms	-
Now finally update unbound configuration:
$ sudo nano /etc/unbound/unbound.conf.d/server.conf
forward-zone:
        name: "."
#        forward-addr: 208.67.222.222  # IP of OpenDNS #1 resolver
#        forward-addr: 208.67.220.220  # IP of OpenDNS #2 resolver
#        forward-addr: 9.9.9.9         # Upstream Quad9 resolver
        forward-addr: 127.0.0.1@5353  # Our own DNScrypt-proxy server
And restart unbound:
$ sudo systemctl stop unbound
$ sudo systemctl start unbound
Android Clients
Many Android clients disconnect from VPN upon sleep, this page has various workarounds for different vendors.